With DVD Photo Slideshow tool, you are allowed to burn photos to DVD. With some simple clicks, you are able to make dynamic photo slideshow DVD and movie. DVD Photo Slideshow is impressing and appealing, which can express your feelings as flash photo slideshow movie.By using DVD Photo Slideshow tool,you can easily burn photos to DVD,convert photos to all kinds of slideshow video for iPod,iPhone or iPad.You can also use DVD Photo Slideshow to create MP4 movie,3GP video for all kinds of mobile phones.
How to burn your Photos to DVD and Play on TV with DVD Player to show photo slideshows on TV ?
You need to download the Photo DVD Slideshow software and install it. After successfully launch Photo DVD Slideshow, you can follow 3 simple steps to create and organize your photo slideshow albums, set disc DVD menu, burn your photo albums on a blank DVD-R/RW, DVD+R/RW, CD-R or CD-RW disc. After finish making ,you can enjoy your creative photo slideshows on TV by a DVD/VCD player.
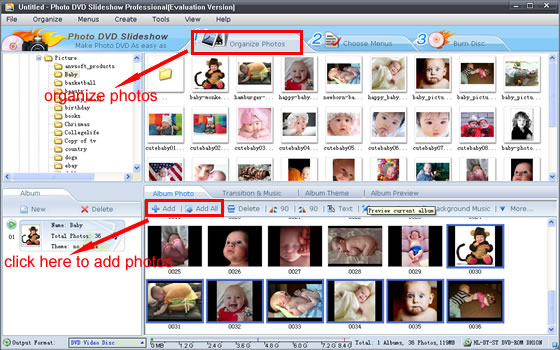
Step 1. Create and organize photo album
When you run Photo DVD Slideshow, it automatically opens a new project and lets you start creating a slideshow. A new project always uses Photo DVD Slideshow's default project settings. To see and modify these settings based on your Options.
Then click the Organize Photos button to create at least one photo album and select photos from a folder on your hard drive and add them to a particular album. After creating a photo album, you can customize the photo album by adding, deleting photos, arranging the order of photos during slideshow playback, adding captions for photos, selecting transition effects
If you are not satisfied with your selection, you can click the thumbnail of the photo album from the Photo Album area (the left-down panel) to select an album you want to remove from the slideshow, but do not worry, when you delete a photo album, all photos inside the album will be removed, but the original photos will not be deleted physically from your hard drive.
When clicking the Music & Transition Effects tab, you may add background music and select your desired transition effects from more than 260 amazing special transition effects. You may also apply Pan & Zoom effect to your creative works. The Preview window gives you ideas of how your slides will show on TV with DVD player.
Then you can preview what you have selected by clicking the Preview tab and can also stop playing by clicking Stop button.
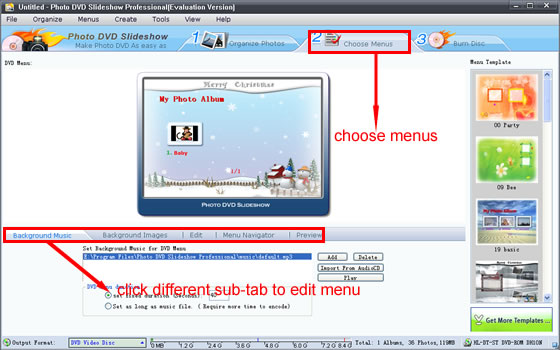
Step 2. Design your DVD disc playing menu
Once you have all your photo albums ready, it’s time to build a DVD-style menu system. Click the Choose Menus button to select a template of disc menu which decides how the photo album will be shown on your photo CD or DVD disc. You can edit the disc menu by adding your favorite background music in WAV or MP3 format and background image in JPEG, JPG, TIF, GIF, BMP format to the selected disc menu. You may select the pull-down menu in the right column to check out the predefined disc menu templates that come with the software.
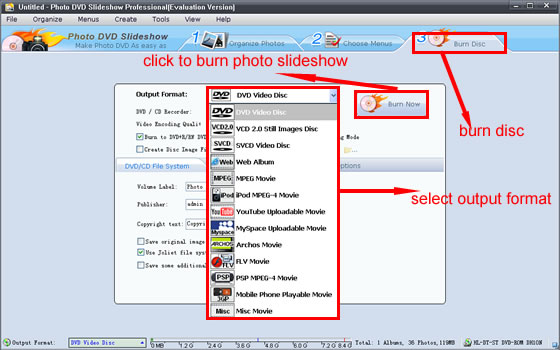
Step 3. Burn photo slideshow albums to DVD disc
Click the Burn DVD button to burn your photo albums to a blank DVD+R/RW or DVD-R/RW disc. Before burning, some parameters must be set including:
The DVD File System tab:
In this tab, you can input the Volume Label, Publisher and Copyright text.You may also choose to Save original images and music files on disc and Use Joliet file system for long file name.
The TV System tab:
This tab enables you Select PAL or NTSC format, choose TV cropping value, and whether applying anti-flickering filter.
Notes: The NTSC and PAL are two different standard protocols for television (TV) broadcast transmission and reception. The NTSC standard is used in the United States while PAL is used in other parts of the world. You can select the radio button of PAL or NTSC according to the standard selected in your country.
The DVD Recorder Options tab:
In this tab, you can select the options of the recording speed, simulating and the Burn-proof disc protection.
Speed - If your drive supports multiple speeds, this selection allows you to change the speed at which the disk is written. If you encounter problems when burning your disc, try lowering this setting.
Simulate - When checked, the disc will not actually be burned. The software will test the burning process to see if it functions correctly, but will not actually write the data.
Copies - Specifies the number of copies to make of the disc. If you would like to make more than one copy, enter the number of copies to make here.
After you set the above parameters, you may click the Burn Now button and you creative slideshow will be burned to a DVD disc.
After your photo slideshow DVD disc is recorded, you can play it by using DVD player on your computer at first. It the slideshow DVD is OK, you can play it on your DVD player with TV .You can see that your photo slideshows will be showed on your TV .


For the past few years, DPS Dave has emerged as a flag bearer in the domain of digital slide scanning services and revolutionized the arena with its brand new patent worthy technology that has brought a whole new range of opportunities for its customers. A sneak peek into their world reveals a bunch of seasoned professionals assisted by modern digital technology tirelessly working hard to give people their much needed happiness when it comes to slide scanning, retouching and restoring their old, faded photos by means of turning them into digital form.
ReplyDelete